Recently I came across a nice post from Ravgeet Dhillon, which looked at how to Add Unsubscribe link in emails using Google Apps Script. The solution uses a Google Sheet and a Google Apps Script web app to add an unsubscribe link to emails. As I noted when shared via AppsScriptPulse this is a useful addition if your mailing needs comply with PECR or similar electronic communications regulation compliance.
Having recently updated my ‘Create a mail merge using Gmail and Google Sheets’ in the Google Workspace Solution Gallery to handle inline images I thought it would be useful to show how this example can be extended to include a variation on Ravgeet’s post.
To avoid copy/paste coding you can make a copy of Gmail/Sheets Mail Merge – Unsubscribe – Note: you’ll still need to follow the Publish the Web App instructions.
Changes to the Google Sheet

Next to the Email Sent column I’ve added Token and Unsubscribed, which have the following purposes:
- Token – to record a unique identifier the person uses to unsubscribe
- Unsubscribed – updated with ‘yes’ if the user unsubscribes
Important: In this solution Token needs to be the next column to the right of Email Sent. Both Token and Unsubscribed can use different heading names but this must be updated in the source code.
Creating and storing a token
In Ravgeet’s post he created a hash using Google Apps Script’s computeDigest() method. This is very secure but I’ve taken a slightly different approach of generating a base-64 web-safe encoded string using Utilities.base64EncodeWebSafe(). The reason I’ve done this it means I can encode additional data which is used if the user clicks unsubscribe:
/**
 * Generate an Unsubscribe Link token which includes email, sheet name and timestamp
 * @param {string} emailAddress email address of recipient
 * @param {string} nameOfSheet storing subscriptions
 * @return {string} encoded string
*/
function generateUnsubscribeToken(emailAddress, nameOfSheet){
  return Utilities.base64EncodeWebSafe(JSON.stringify({email:emailAddress,
                                                        sheetName:nameOfSheet,
                                                        created_at:new Date()}));
}
To generate and use the token after we define the msgObj in the original solution I’ve added:
const token = generateUnsubscribeToken(row[RECIPIENT_COL], sheet.getName());
const unsubscribe_link = BASE_URL+'?token='+token;
msgObj.text += `\n\n${unsubscribe_link}`;
msgObj.html += `<p align="center"><a href="${unsubscribe_link}">Unsubscribe</a></p>`;
This generates the token and markup for an unsubscribe link adding it to the end of our merge message. Some additional changes are required in the original solution to record the token as part of the merge process:
out.push([new Date(),token]);
And
sheet.getRange(2, emailSentColIdx+1, out.length, 2).setValues(out);
Recording an unsubscribe request
To log the unsubscribe request the doGet passes the url token:
// Based on code/idea from
// https://www.ravsam.in/blog/add-unsubscribe-link-in-emails-using-google-apps-script/
function doGet(e) {
  const token = e.parameter['token'];
  const email = unsubscribeUser(token);
  if (email) return ContentService.createTextOutput('You have unsubscribed: '+email);
  return ContentService.createTextOutput('Sorry something went wrong');
}
To process the token and record the request the following function is used:
function unsubscribeUser(token) {
  // decode the unsubscribe token to get the email and sheet
  const decoded = Utilities.base64DecodeWebSafe(token);
  // As this returns Byte[] returning as string and parsing
  // https://developers.google.com/apps-script/reference/utilities/utilities#base64decodewebsafeencoded
  const param = JSON.parse(Utilities.newBlob(decoded).getDataAsString());

  const sheet = SpreadsheetApp.getActiveSpreadsheet().getSheetByName(param.sheetName);

  // get the data from the sheet
  const data = sheet.getDataRange().getValues();
  const headers = data[0];

  // column index of email address column
  const emailIndex = headers.indexOf(RECIPIENT_COL);
  // column index of unsubscribe column
  const updateColIndex = headers.indexOf(UNSUB_COL)+1;

  // Based on https://tanaikech.github.io/2020/09/30/benchmark-process-costs-for-searching-values-in-spreadsheet-using-google-apps-script/
  const row = sheet.createTextFinder(token).findNext().getRow();

  if (data[row-1][emailIndex] === param.email){
    sheet.getRange(row, updateColIndex).setValue('Yes');
    return param.email;
  }
}
If you are familiar with Google Apps Script this hopefully makes sense. The token in the web app url is decoded to allow access to parameters that were encoded like `sheetName` and `email`. A line worth highlighting is:
const row = sheet.createTextFinder(token).findNext().getRow();
Finding data in a Google Sheet is a common action. There are various ways to approach this using loops and filters. In this example I’m using .createTextFinder() which can be used with:
Spreadsheet.createTextFinder(findText)Sheet.createTextFinder(findText)Range.createTextFinder(findText)
The .createTextFinder()/TextFinder is a useful method to have in your tool chest as it can be used to replace as well as find text. When text is found it can be used to return a Range making operations like changing values in the matched row easier. If you are interested in finding out more about TextFinder I recommend Kanshi Tanaike’s experiments on process cost, which shows the benefits of using TextFinder to retrieve rows.
Publish the Web App
Before we can send emails with our unsubscribe links we need to publish the web app we’ve created. To do this, if not already, in your Google Sheet open Tools > Script editor, which should give you something similar to below:

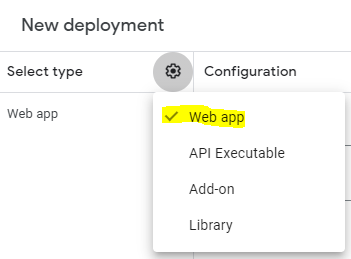
Click the Deploy button and select New Deployment. In the New deployment box make sure Web app is ticked

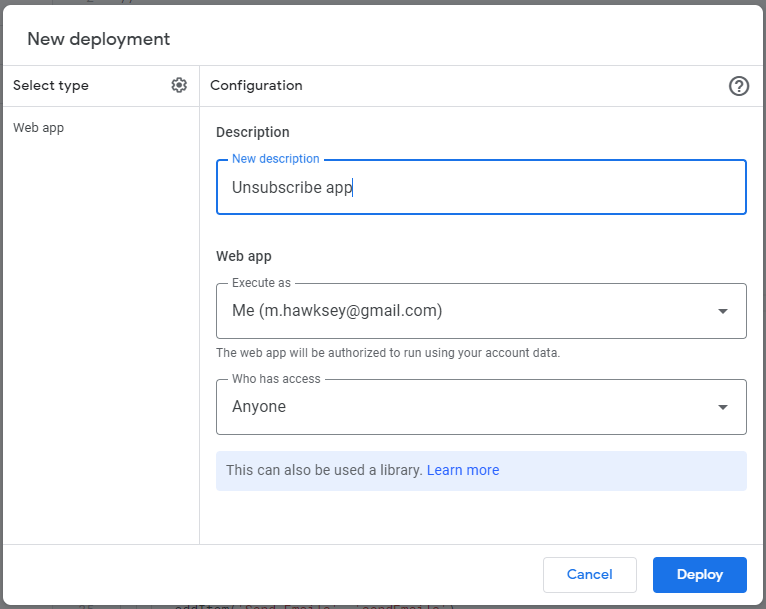
Give your deployment a description and check that the Web app executes as Me and Anyone has access and click Deploy

If this is the first deployment you will have to authorise the script. If you are deploying using a @gmail.com (consumer) account on the ‘Google hasn’t verified this app’ screen you will need to click Advanced and Go to Gmail/Sheets Mail Merge (unsafe)

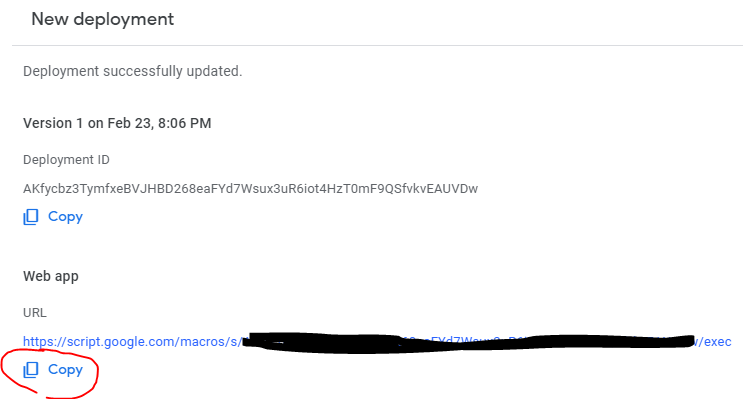
You will then have an option to Copy the Web app URL and paste this instead of the YOUR_WEB_APP_URL in line 27.

Sending your mail merge
From this point onwards we are back to following the mail merge solution:
- Update the Recipients column with email addresses you would like to use in the mail merge
- Create a draft message in your Gmail account using markers like {{First name}}, which correspond to column names, to indicate text you’d like to be replaced with data from the copied spreadsheet.
- In the copied spreadsheet, click on custom menu item Mail Merge > Send Emails.
- A dialog box will appear and tell you that the script requires authorization. Read the authorization notice and continue.
- When prompted enter or copy/paste the subject line used in your draft Gmail message and click OK
- The Email Sent column will update with the message status.
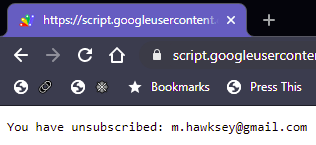
As well as the Email Sent column updating a Token will be recorded and if a recipient does click the unsubscribe link there is a confirmation:

And the action is recorded in your sheet.

Summary
Hope you’ve found this example useful and if nothing else you’ve now discovered TextFinder. Don’t forget you can find more examples of solutions with Gmail and Google Apps Script in AppsScriptPulse.