Regular readers of this blog will notice an almost schizophrenic approach to posts, going from sound* educational technology advice (voting systems, feedback, social media) to the other end of the spectrum with general frolicking in code, mashups and anything with a binary pulse. A new area which up until now I’ve been keeping a watching brief on is widgets.
* Well one hopes that it’s interpreted as such
The general concept of a widget is a reusable block of code that can be dropped into a webpage. You probably already use lots of widgets like twitter badges/buttons, website counters, rss feed displays. The reason I’m interested in widgets is they provide a way for students to personalise the way they interact with big systems like your institution’s VLE.
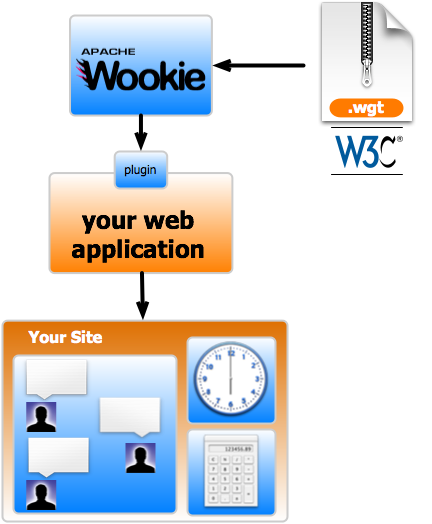
Sheila MacNeill from JISC CETIS has a nice post summarising a recent event they ran to showcase some of the existing projects (JISC and EU funded) using widgets in education which was followed by tutorials to help participants make their own widgets build for the Apache Wookie widget server (See Widget Bash – what a difference two days make). Wookie is designed to serve widgets,built to the W3C widget specification, yes that’s right there is a specification for widgets, but using extended APIs can incorporate other widget formats like Google Wave Gadgets and OpenSocial. (It was actually when I was exploring the use of Google Wave back in late 2009 that I first came across Wookie (See Moodle Wave: Embedding Google Wave into Moodle)).
As I wasn’t able to attend the CETIS Widget Bash I’ve been catching up via various blog posts (Widget Bashing, Widget development and more here) to the point that I thought I should have a go myself.
Step 1 download and install the latest version of Wookie … and that was how far I got.
I didn’t go any further because having already made my first widget I knew at a basic level all it required was some xml and html and installing Apache Ant, configuring IDE’s … might be too off putting for the average user. What I wanted was to do was run a file and start playing a Sudoku widget.
Through the EduApps initiative for the last 2/3 years I’ve been supporting the use of portable open source and freeware applications which can be run from a usb stick. This method is a create way to distribute and make people aware of all the goodness of open and free software tools without the need to install anything on their PC. True plug and play.
So after some tweaking and support from the [email protected] list (view archives here) below is a packaged version of:
*** Portable Apache Wookie Server [Win32bit only I’m afraid] ***
SHA-256: 27EAA7A3FA314FF94050BE6F8BCDE5F19DD55966894A2E928C8D372F29106F36
To use, extract the files to the root of a usb stick, the structure should look like:
F:\
   +--- ant
   +--- Java
   +--- RapidSVN
   +--- wookie
   |
   +--- wookie_usb_start.bat
   +--- wookie_usb_start_debug.bat
To run follow steps 9 to 11 from the section below. The package also includes RapidSVN which will allow you to synchronize the stick with the latest project files. To do this run PortableRapidSVN.exe in the RapidSVN folder and select Modify –> Update.
More information on Wookie and widgets here including:
Documentation
- Downloading and Installing Wookie
- Wookie Server Administrators Guide
- Embedding Wookie Widgets
- Building Widgets
- Using Wookie’s W3C Widget Parser in other Applications
- Integrating Wookie with Shindig
- Testing a Release
- FAQ
Portable Apache Wookie Server Recipe
- Download Apache Ant 1.7.1 (NOTE: There is a known issue when using Ant version 1.8.x)
- Extract Ant to USB drive root e.g. F:\ant
- Grab the latest Wookie server code (you’ll need to use a SVN Client like TortoiseSVN or RapidSVN) to do this). The url for the code is http://svn.apache.org/repos/asf/incubator/wookie/trunk
- Place the code in a folder on your stick e.g. F:\wookie
- If you don’t have it download and install the latest Java JDK
- Copying the contents of C:\Program Files\Java\jdk1.6.0_24 to F:\Java
- Navigate to F:\ant\bin\ and edit ant.bat, find :checkJava and after
set _JAVACMD=%JAVACMD%
add these 2 lines:
set pathDrive=%cd:~0,2%
set JAVA_HOME=%pathDrive%\Java
- Navigate to F:\ and make a new Text Document. Open the file and add:
@echo off
set pathDrive=%cd:~0,2%
cd %pathDrive%\ant\bin
call ant.bat -buildfile %pathDrive%\wookie\build.xml -Divy.home=%pathDrive%\ivy run
pause
- Save the file as wookie_usb_start.bat
- You should now be able to run wookie_usb_start.bat (the first time you run it, it will compile the project files which can take up to 20 minutes, after that it will take around 5 minutes)
- When the command window reaches the line below open http://localhost:8080/wookie to try out the example widgets:
 22:28:45,578  INFO ContextListener:210 - freeder' -
Widget was successfully imported into the system.

James
Martin, Gadgets are great and you can now use Google Apps Script to put a Script UiApp in a Google site as a Gadget.
Check out my example at: http://sites.google.com/site/scriptsexamples/gs-interactive
Same page shows how to shorten up: element.setStyleAttribute(“attribute”, “value”)
Martin Hawksey
Hi James. This is brilliant! I’ve been dipping in with UI Services (partly using your stock watcher tutorial as a learning resource), but never had any idea you could do so much with the interface. Developing interfaces using Apps Script seems to be the new fertile ground for Google Apps developers and it’s certainly where my next project will be. So maybe I’ll be able to combine some new and old passions, gadgets and Apps Script 😉
Martin
Sheila MacNeill
Hi Martin
This is great and thanks for sharing here and with the wookie community too – wish I’d thought of doing that before the widget bash!
Sheila
Martin Hawksey
Next time 😉